Recipe: Old Fashioned Beef Stew

On cold, rainy, boring days, I am a huge sucker for a good, hot soup, and Spring Break was no exception! We had some ugly, gray, dreary days and the perfect cure was to make a slow-cooked homemade beef stew from scratch. I love my beef stew recipe because it is the perfect “throw it in the pot and leave it alone” recipe. Its great for slow cookers and freezes beautifully!

You will need:
-1 pound of stew beef chunks
-3 russet potatoes, skinned and diced
-3 large carrots, chopped
-1 1/2 cups of frozen peas
-1 cup finely diced onions
-salt and pepper to taste
-a dash of flour

I like to start off by adding my meat into my slow cooker or stew pot first, so I know that it has loads of contact with the heat and gets fully cooked. Next, I add in my potatoes, which have been cleaned, skinned, and diced into small chunks. I add these in next since I love my potatoes cooked to almost-mush. Now, add in your carrots. If you do not want to use whole, chopped carrots, try adding in baby carrots. It works great and cuts out some prep time!

I love to add in flash frozen peas to my beef stew because I am a big pea girl. I think that flash frozen peas have the best flavor, too! Lastly, on top, I add in my very finely-chopped onion. I will admit, I am not a fan of onion in the slightest, but the flavor value is undeniable, so into the pot they go!

Now, I will add water to the pot or slow cooker until most of the ingredients are covered. Set your stew to cook on low, cover it, and walk away! Let it cook on low for a few hours, stirring occasionally if you feel like it.

Once everything has had the chance to cook for a while, add some salt and pepper to your liking. I also like to add in a dash of celery powder if I have some handy. Celery gives another really great flavor, but I cannot stand the texture of cooked celery. Powder is the next best thing!

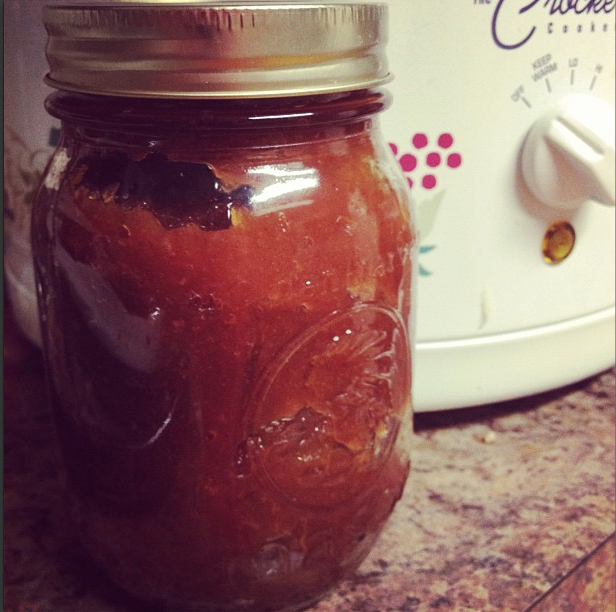
After cooking for a few more hours (it will be done when the meat is fully cooked and the potatoes and carrots are tender), start adding in flour one tablespoonful at a time to create a nice, thick gravy. I ended up using around 3 tablespoons of flour to get the gravy pictured below.photo1

And that’s it! This is a super easy recipe that needs very little prep time with leftovers that save beautifully! Enjoy your delicious stew the next time you are cursed with a gray, rainy day!

Recipe: Classic Yeast Bread

After my success at Banana Nut Bread, I decided to make the leap and give yeast bread a try… Scary, right? Not really! I was actually surprised at how well my first exploits turned out, considering I am still new to the “bread from scratch” world. I thought I would post a nice walkthrough of what I did to obtain these yummy yeast loaves. Honestly, it was not difficult and it was really relaxing!

First off, you want to get your yeast started. You will need:
– 2 cups of warm water (between 100 and 110 degrees)
– 1 cup of sugar
-1 packet of activated yeast
Start off by combining your warm water and sugar until the sugar is completely dissolved. This will get your yeasties going and “feed” them, so to speak. This is the most important step of the process, so pay attention! Once the sugar is dissolved, you will add your packet of activated yeast and stir it until combined. Now… leave it alone! I let mine sit for 6 minutes and it turned out perfect. You will want to look for signs that your yeast is active, like small bubbles forming on the surface, billowing yeast, or yeast moving in circles in the bowl. If you get any of these, you are good to move on to the next step!

Now, you will need:
-1 cup of bread flour (I cheated and used all purpose flour)
-1 tablespoon of salt
-5 more cups of bread flour
To your yeast mix, you will add your first cup of flour. This will act as a barrier between the yeast and the salt. Stir this in well with a standing mixer. Once the first cup of flour is mixed in, add your salt while still mixing, then add in the rest of the flour in small increments. Combine everything well!

Once all of the ingredients are well combined, turn off your mixer and move your dough to a floured surface and kneed! This was my absolute favorite part. It was so zen-like! You will want to mash, bash, and kneed your dough until it is no longer sticky. Try to aim for at least 5 minutes of kneeding, but I went much longer than that.

After you finish kneeding your dough, form it into a ball and place it in a floured bowl and cover the bowl with a damp rag. Place the whole thing in a warm space, like on your oven, and leave it for up to two hours to rise. Your dough will finish rising once it has doubled in size. You can also test by poking the dough with your finger. If the indention stays, your dough has finished rising.

I gave my dough another round of kneeding with flour before splitting it into two to make two separate loaves. Once the loaves were formed, I let the dough rise for a second time in the loaf pans. This time, my loaves only needed a 30 minute rise before they passed the indention test.

You will want to bake your loaves at 350 degrees for approx. 40 minutes. I pulled my loaves out at 30 minutes and brushed the tops with an egg wash to give them nice brown tops. You can test your loaves to see if they are done by tapping on the top. If you loaves sound hollow, they are fully cooked!photo2

Enjoy some tasty homemade breads! I loved eating these yeast breads with some of my soups!

Recipe: Banana Nut Bread

It must be pregnancy cravings because I have been hit by the bread bug HARD. I cannot get enough bread! My figure is going to hate me for this, but its sooo goood… And I have taken to making my own breads, which has been a fun, exciting challenge!

My first attempt at homemade bread was this banana nut bread recipe that my sister shared with me. This recipe made a really great banana bread! It was super moist with a really crunchy crust…

You will need:
– 3 overripe bananas
– 1/4 cup soft butter
– 1 cup sugar
– 1 egg
– 1 tsp baking soda
– Dash of salt
– 1 1/2 cup flour
– 1 small pack of chopped walnuts

Start off by combining your bananas, butter, sugar, and egg in a mixer and run it until everything is combined really well. You want to make sure that your bananas are no longer “chunks.”

Next, add in your baking soda and salt, followed by the flour which you will want to add slowly… Unless you love to clean gigantic flour messes! Blend everything together until it is smooth, then take your mix from the blender.

Now you will want to add your nuts. If you dont like walnuts, you can always leave these out. If you add them, add most of them to the batter and mix in with a spoon to evenly spread things out. I like to save a bit of my nuts to sprinkle on top.

To prep your baking tin (I used an 8X4 bread tin), I liberally coated the inside of my tin with some soft butter to keep my bread from sticking. You can always use cooking spray if you prefer.

Now, spoon in your mix, evenly spreading it in the tin. If you saved some nuts, sprinkle them on top.

You will want to bake your bread at 350 degrees for 1 hour, minimum. It was a humid day when I made mine and I ended up having to add approx. 20 minutes to my baking time. Make sure you bake your bread long enough that it passes the butter knife test. (Butter knife test: if you stick a butter knife in the center of your bread, it should come out clean with no batter attached!)photo3

Nom nom nom! Enjoy your delicious banana nut bread!

Recipe: Cuppa Cuppa Cuppa

I’m a g1ood, decent southern girl, and like all good, decent southern girls, I’ve watched Steel Magnolias so much I can quote it. My inner cook was intrigued by Truvy (played by the amazing Dolly Parton) and her “cuppa cupppa cuppa”, so I decided to give it a go and it made the most delicious desert!

Just like Truvy says, you will need:
– “It’s just a cup of flour, a cup of sugar and a cup of fruit cocktail WITH the juice, stir and bake in a hot oven ‘til golden brown and bubbly.  I serve it with ice cream to cut the sweetness.”

Seriously, its that easy! I grease my baking pan well with butter before baking, which eases clean up. I bake at 375 degrees (my magic temperature) and it doesnt take long before my kitchen begins smelling amazing.

Recipe: Strawberry Waffle-Muffins

Inspired by my cinnamon roll waffles, my kiddo and I set out to see what other treats we could cook up in my waffle maker. We stumbled across this sweet, crunchy breakfast twist and it has been delicious. Introducing: Waffle-Muffins!
1
You will need:
– Muffin Mix (made with package instructions)

1. Preheat your waffle maker. I ran mine at medium heat and it worked very well.
2. Mix your muffins as instructed. Mine needed 1/2 cup of milk, which I substituted coconut milk for, and it worked like a charm.
3. Pour your muffin mix in the waffle maker, then close up and cook.
4. Leave your muffin to cook until no steam escapes. Waffle-muffins will be “done” when golden brown and crispy.

Recipe: Fan Potatoes with all the Fixings

Screen Shot 2015-02-10 at 5.58.54 PM

My dad, sister, and I love to watch America’s Test Kitchen on PBS, and when I laid eyes on these yummy fan potatoes, I knew that I’d be making these things all the time! They taste fantastic, have all of the goodness of a baked potato with the crispiness of fries!

You will need:
-Baking potatoes
-oil (I use olive oil, but any cooking oil will work)
-Your favorite potato toppings (We love cheese, sour cream, chives, and bacon bits)

1. Start by washing your potatoes well.
2. Next, you will want to make very precise cuts on the potato. Make your cuts about 1/4 inch apart and cut only 3/4 of the way through the potato. Do not cut all the way through!
3. Rinse your potato cuts to wash away excess starch. This was America’s Test Kitchen’s secret. If you do not rinse, the starch will act as a glue and your slices will stick together once they bake. Rinse well!
4. Drizzle your cooking oil on your potato, making sure to liberally coat the inside of your cuts.
5. Bake! You will want to bake until the potato slices turn golden brown.
6. Top with your toppings and enjoy!

Recipe: Appalachian Soup Beans

Screen Shot 2015-02-10 at 5.56.05 PM

Most of us who were raised in Southern Appalachia have eaten soup beans at one time or another in our lives. These tasty, cheap beans can be picked up at any grocery store in the dry goods section and can make enough food to feed a family for at least 2 meals, maybe more. One way that I tweak my soup beans is by making them with veggie stock rather than ham stock… I have never been a fan of ham, and substituting veggie stock makes this a really great vegan recipe as well!

You will need:
– 1 bag of dry soup beans (often called a 16 bean soup)
– Veggie stock (I use liquid stock, but if you want to use cubes, try 2 cubes of stock to start with)

1. Start off by rinsing, then soaking your beans overnight. I set mine out to soak before I go to bed and by morning they are ready to start cooking.
2. Once your beans have soaked, drain the excess water, then rinse and drain again.
3. Add in your veggie stock. I use at least 16 oz of stock, then add water until the beans are fully covered.
4. Set your beans to cook. I prefer to cook mine on low in a crock pot for most of the day. If I start my beans in the morning, they are always ready by dinner time.
5. Check your beans every few hours or so and give them a stir. Feel free to add water if needed. Your beans will be done when they are tender and have made their own “gravy.”

Soup beans are traditionally served with a side of warm cornbread… Ahh, comfort food!

Recipe: Homemade Pear Butter

Screen Shot 2015-02-10 at 5.58.39 PM

Just like my peach preserves, I wanted to try my hand at canning some delicious pears that grow at my husband’s family farm. The pears are tasty and plentiful, since no one but me seems to enjoy them, so I always get my pick! This past summer, I gave pear butter a go, and the results were delish!

You will need:
-Pears (washed, peeled, cored, and cut)
– Cinnamon, white and brown sugar, clove to taste

1. Start off by cooking your pears on the stove with enough water to cover them. You will want to cook them until tender.
2. Once tender, blend your pears with an immersion blender until you get an applesauce-like consistency.
3. Add in your sugars, cinnamon, and clove to taste.
4. Follow the canning steps that I laid out in my Peach Preserves post to save your pears!

Recipe: Quick and Easy Homemade “Fudge”

I’ve never been a chocolate kind of gal, but if you put something fruit flavored in front of me, I go nuts! I stumbled across this fruity “fudge” recipe on Pintrest and gave it a go to GREAT results! It was super tasty, really easy to make, and is sure to put you in the highest of sugar highs!

You will need:
-1 bag of white chocolate baking chips
-1 can of frosting (I’ve used strawberry frosting and lemon frosting with excellent results)

1. Melt your bag of chocolate chips in a microwave safe bowl. You will want to heat on high using 30 second bursts.
2. Once melted, stir in your can of frosting until the two are well blended.
3. Spread your “fudge” on a covered baking sheet and let it set until cool. Cut into squares or cut with a cookie cutter and enjoy!

Kiddo enjoying some yummy chocolate fudge!

Kiddo enjoying some yummy chocolate fudge!